Getting Started with Handwrite!
Creating your Handwritten Sample
-
Take a printout of the sample form.
-
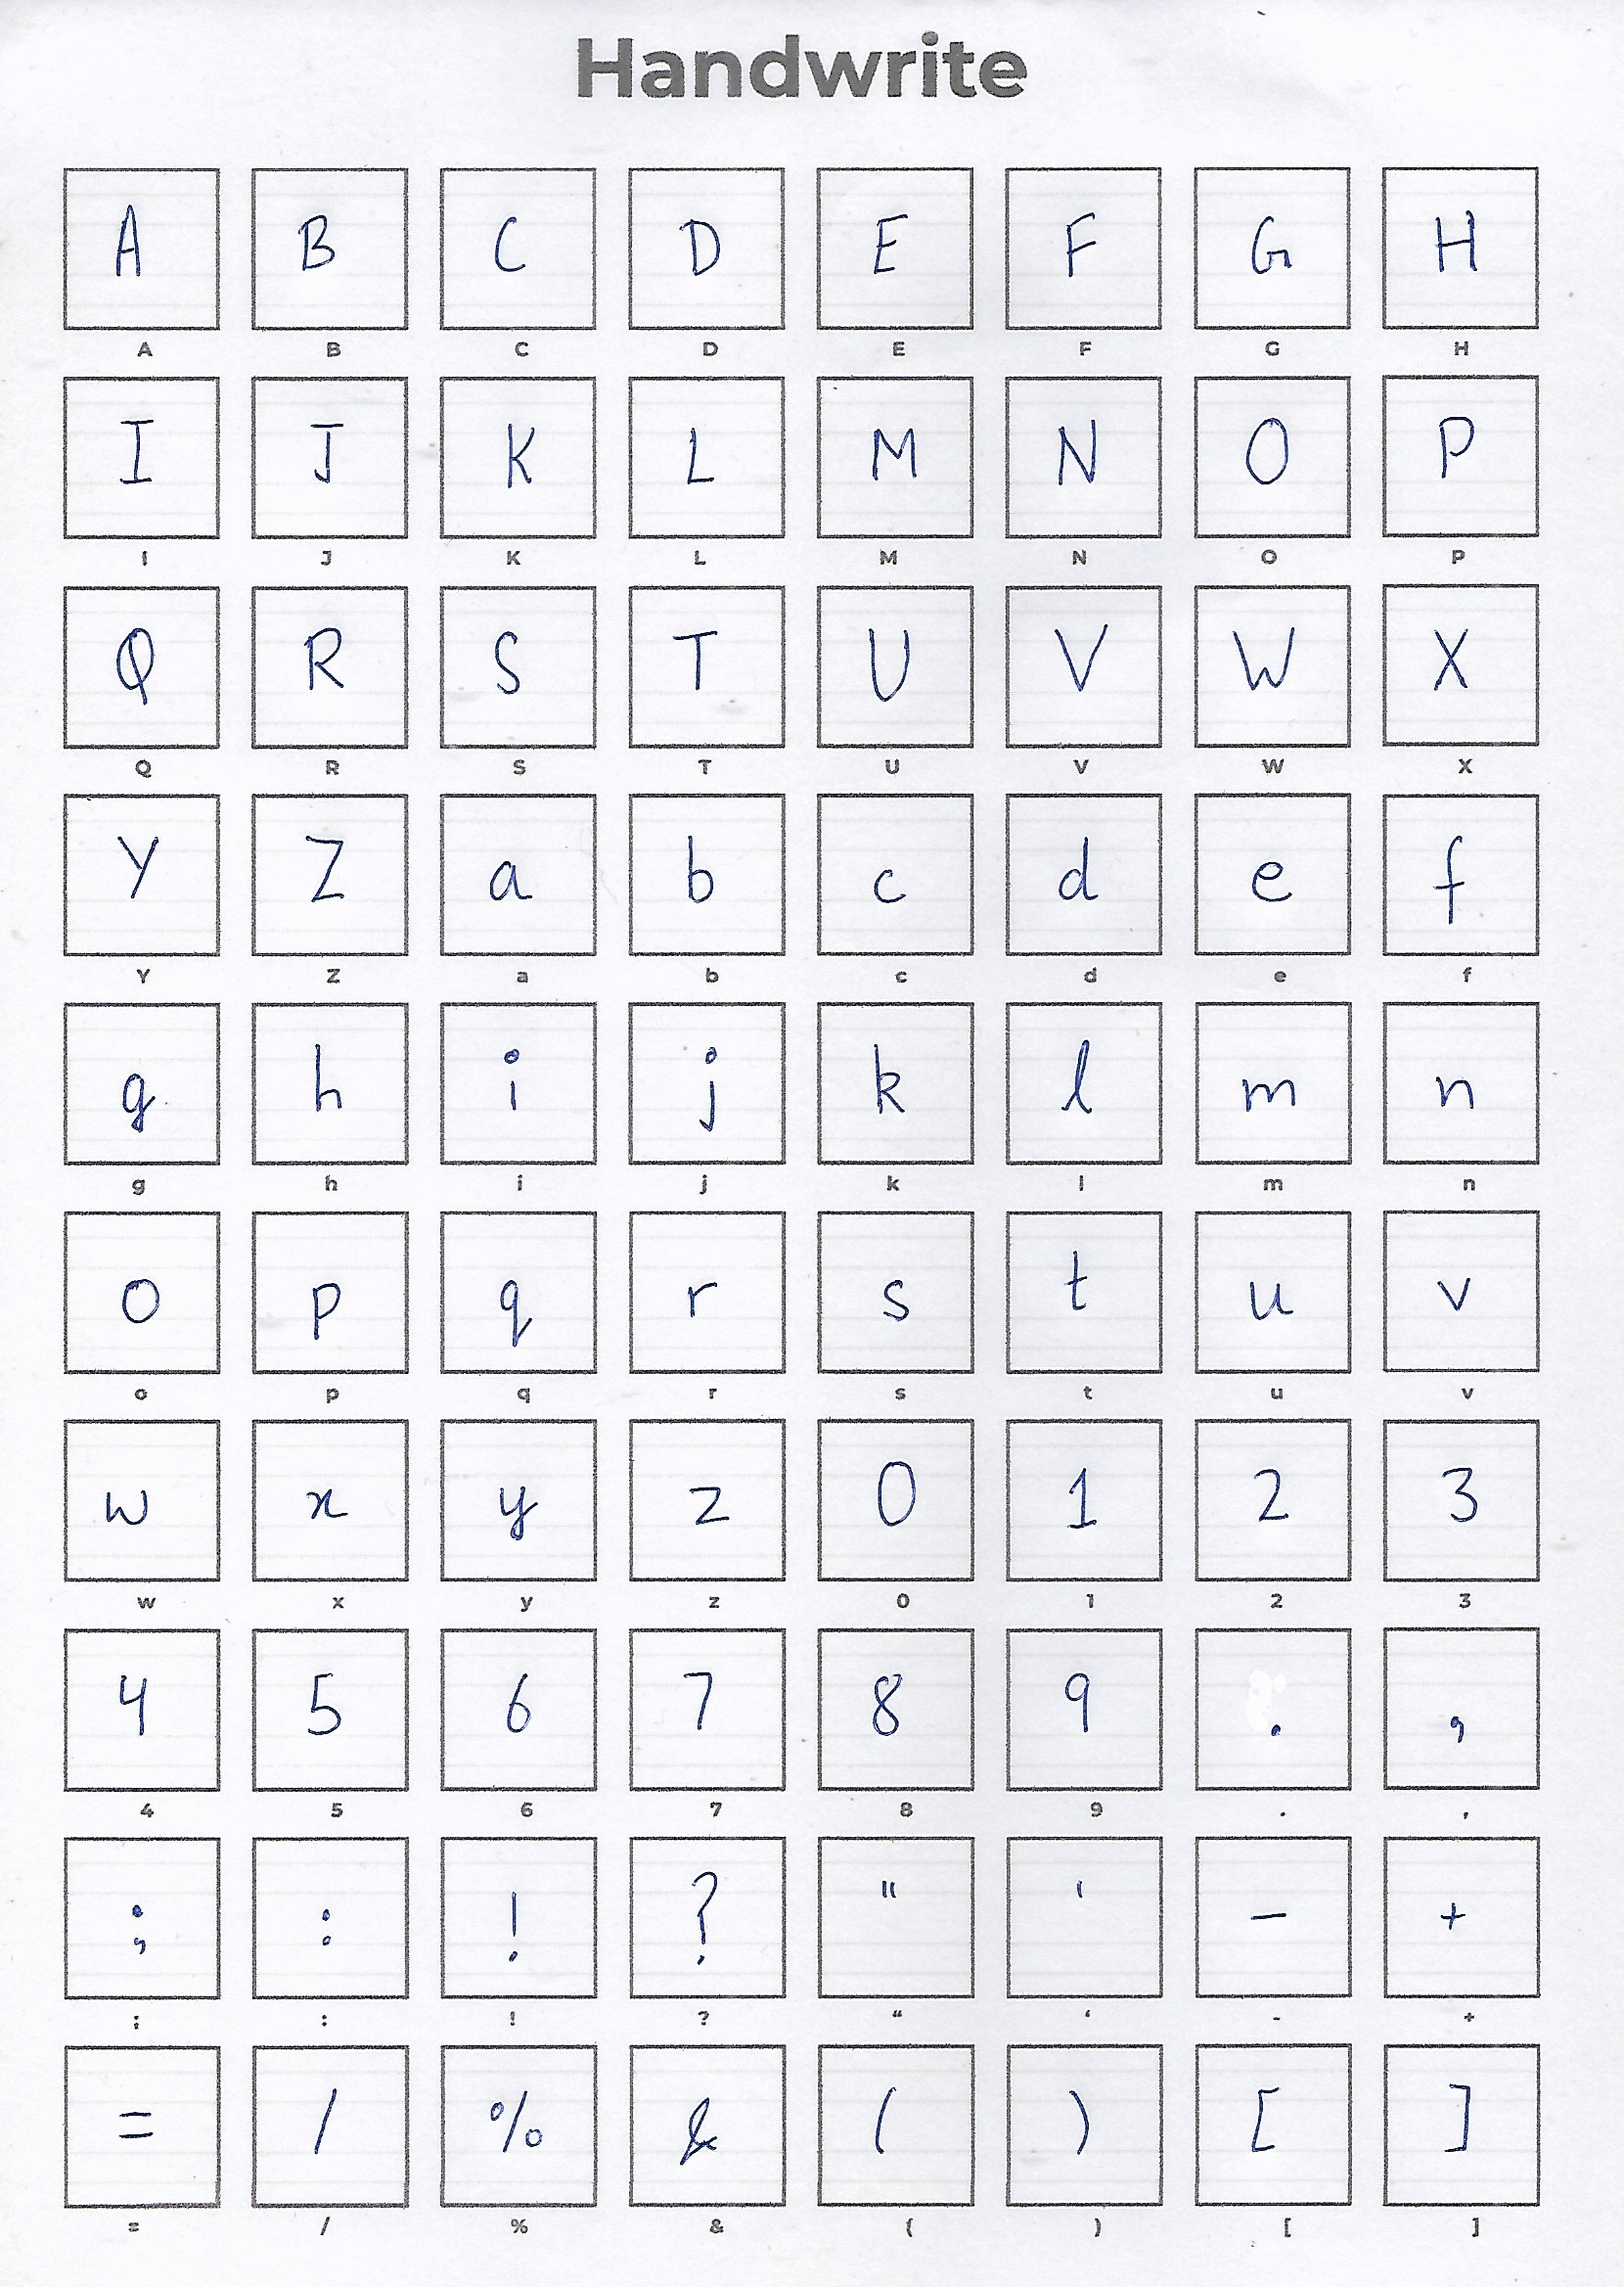
Fill the form using the image below as a reference.
-
Scan the filled form using a scanner, or Adobe Scan in your phone.
-
Save the
.jpgimage in your system.
Your form should look like this:
Creating your font
-
Make sure you have installed
handwrite,potrace&fontforge. -
In a terminal type
handwrite [PATH TO IMAGE] [OUTPUT DIRECTORY]. (You can also typehandwrite -h, to see all the arguments you can use). -
(Optional) Config file containing custom options for your font can also be passed using the
--config [CONFIG FILE]argument.Note
-
If you expicitly pass the metadata (filename, family or style) as CLI arguments, they are given a preference over the default config file data.
-
If no config file is provided for an input then the default config file is used.
-
-
Your font will be created as
OUTPUT DIRECTORY/OUTPUT FONT NAME.ttf. Install the font in your system. -
Select your font in your word processor and get to work! Here's the end result!

Configuring
TO DO